Peeling paint can be a common issue for many homeowners in Akron. It not only looks bad, but it can also indicate deeper problems with your home's surfaces. Understanding why paint peels and how to fix it can save you time, money, and a lot of frustration.
A variety of factors can cause peeling paint. These include moisture, poor surface preparation, dramatic temperature changes, and using the wrong type of paint. Knowing the root cause of the problem is the first step in finding the right solution. Once you identify why your paint is peeling, you can take the necessary steps to fix it.
Fixing peeling paint involves more than just slapping on a new coat. Proper surface preparation, using the right tools, and following a few key steps are essential to achieving lasting results. This guide will help you understand how to effectively deal with peeling paint and prevent it from happening again.
Peeling paint doesn't have to be a constant headache. By following some simple but effective steps, you can restore the beauty of your home and keep it looking fresh for years to come. To tackle this common issue head-on, let's dive into what you need to know.
Identifying Causes of Peeling Paint
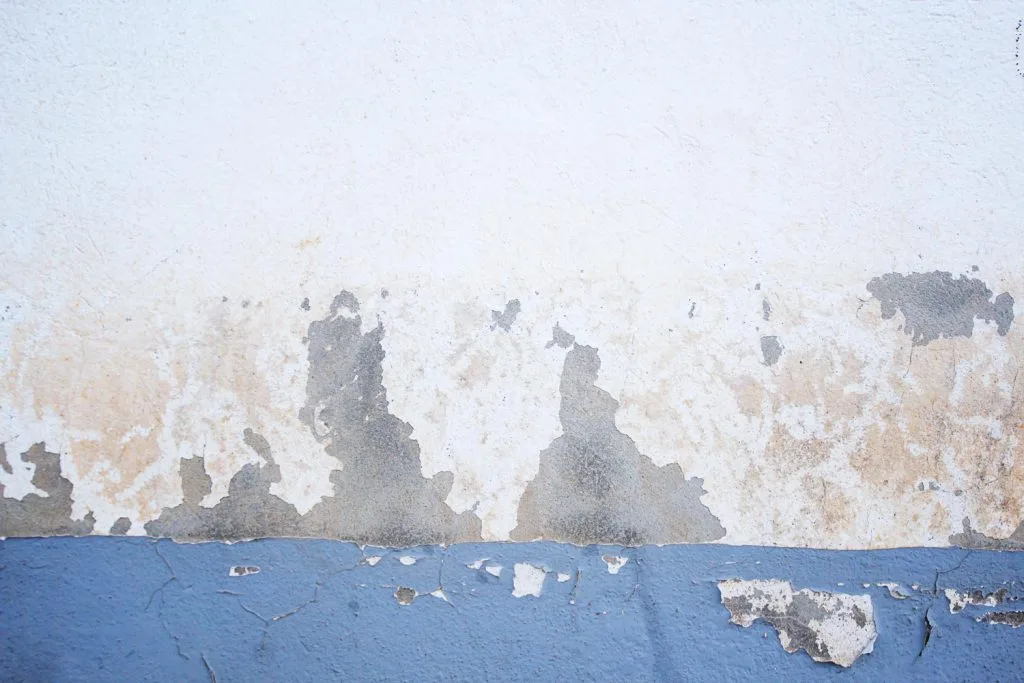
Peeling paint can be frustrating, but understanding the cause is your first step to fixing it. There are several reasons why paint may peel, especially in homes around Akron.
One major cause is moisture. Water can seep into the walls and disrupt the bond between the paint and the surface. This can happen due to leaks, poor ventilation, or high humidity. Moisture causes the paint to bubble and eventually peel.
Poor surface preparation is another common reason. The paint won't adhere well if the surface isn't properly cleaned, sanded, or primed before painting. Dirt, dust, and old paint can create barriers that prevent new paint from sticking.
Fluctuating temperatures can also cause paint to peel. Cold temperatures to hot temps can cause the paint to expand and contract, which can cause cracking and peeling issues.
Using the wrong type of paint or combining incompatible paints can also lead to peeling. For example, applying latex paint over oil-based paint without proper preparation can cause adhesion problems. Always make sure the paints you're using are compatible.
Common Causes:
- Moisture: From leaks, poor ventilation, or high humidity.
- Poor Surface Preparation: Dirty, dusty, or unprimed surfaces.
- Wrong Type of Paint: Incompatible paint types or poor-quality paint.
By identifying and addressing these causes, you can better prepare for effective repairs and long-lasting results.
Essential Tools and Materials for Fixing Peeling Paint
Having the right tools and materials makes fixing peeling paint much easier. Quality tools help ensure a smoother, more efficient repair process. Let’s look at what you will need.
List of Essential Tools:
- Scrapers: Metal or plastic scrapers to remove loose paint.
- Sandpaper: Various grits for smoothing surfaces. The use of a pole sander makes quick work with the right sandpaper grit. Check for lead paint before you sand
- Paint Brushes and Rollers: For applying primer and paint.
- Painter’s Tape and paper machine: Protect areas you don’t want to paint.
- Drop Cloths: To cover and protect floors and furniture.
Necessary Materials:
- Primer: Seals the surface and prepares it for new paint. If water damage is noticed, use a stain blocker.
- High-Quality Paint: Durable and suited for the area you're painting. When painting bathrooms use paint for high humidity.
- Spackle or Filler: For filling in cracks and holes.
- Cleaning Solution: To wash the surface before repairing.
Using sturdy tools ensures you can effectively remove the old, peeling paint. Sandpaper smooths out the edges so the new paint adheres well. A good primer is crucial to sealing and stain-blocking the surface and creating a better bonding layer for the new paint. High-quality paint is essential for a long-lasting finish.
These tools and materials can make the repair job go smoothly. Preparation and the right equipment can help you achieve professional-looking results and prevent future problems.
Step-by-Step Guide to Repair Peeling Paint
Repairing peeling paint involves several key steps. Follow this guide to ensure a long-lasting and smooth finish.
1. Safety First: Wear safety goggles and a mask to protect yourself from dust and paint chips.
2. Remove Loose Paint: Use a scraper to peel away loose paint. Be gentle to avoid damaging the underlying surface.
3. Sand the Area: Use medium-grit sandpaper to smooth out rough edges and create a level surface. A pole sander can assist or a sander with vacuum attachment to contain the dust. There will be less cleanup if you use the vacuum. If your house was built before 1978, check for lead.
4. Clean the Surface: Wash the area with a mild detergent and water. This removes dust and any remaining dirt.
5. Patch Holes and Cracks: Apply spackle or filler to fix any imperfections. Let it dry completely.
6. Sand Again: Smooth the patched areas with fine-grit sandpaper.
7. Prime the Surface: Apply a quality primer to seal the surface. This helps the new paint adhere better.
8. Paint: Apply your chosen paint once the primer is dry. Use even strokes and cover the area thoroughly. This can be rolled and brushed.
9. Inspect: After the paint dries, inspect the area for any missed spots or uneven sections and touch up if needed.
Following these steps ensures you repair peeling paint correctly, giving your walls a fresh look.
Preventative Measures to Avoid Future Peeling
Preventing paint from peeling in the future involves taking proper care before and after your paint job. Here are some effective measures to keep your paint looking fresh.
1. Control Moisture: Fix leaks and ensure good ventilation in high-moisture areas like bathrooms and kitchens. Use dehumidifiers if necessary.
2. Proper Preparation: Always clean, sand, and prime surfaces before painting. Skipping these steps can lead to poor adhesion and peeling.
3. Use Quality Materials: Invest in high-quality paints and primers. Cheap materials often don't hold up well over time.
4. Follow Manufacturer Instructions: Apply paint and primer according to the manufacturer's guidelines, including the recommended drying times between coats.
5. Regular Maintenance: Keep the painted areas clean and dry. Avoid using harsh cleaning agents that can damage the paint.
Taking these preventive steps helps ensure that your paint job lasts longer and remains in good condition, saving you time and money on future repairs.
Conclusion
Dealing with peeling paint can be a challenge, but understanding the causes and solutions makes it manageable. By identifying why your paint peels and using the right tools and techniques to fix it, you can restore the beauty of your Akron home. Preventive measures also play a significant role in keeping your paint job looking fresh and new for years to come.
A smooth, well-done paint job enhances your home's appearance and protects your walls from further damage. Whether dealing with minor peeling or larger, more extensive issues, knowing how to address them effectively is vital.
For professional help and guaranteed results, consider Kane Painting. Our team of experts in Akron, Ohio, has the knowledge and skills to handle your painting needs, ensuring a job well done. Contact Kane Painting today for interior and exterior painting services so we can give your home the care and attention it deserves.